Sunday, October 28, 2007
Finishing up the Animation for real - continued 2
Installment 3:
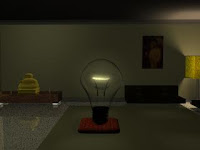
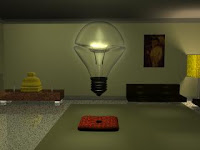
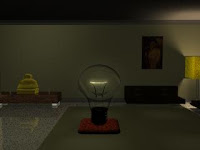
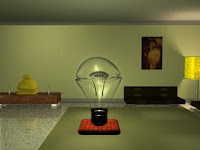
So I had to work with the driven keys a lot to animate the glow effects on Phil. There are three glow effects. One for the mouth shader (the filament), one for his body, and one is an actual point light parented to his head that resides in the center of the filament, that way I could get the glow effect and actually light up the room. I was trying to control it all by driving them with the Translate Z of the ROOT, but that was not working because I wanted the glow to change when he was working himself up, not just when he was floating. So I created a funky unidirectional nurbs curve and set the Translate Y to control the mouth glow, Translate X to control the light intensity, and the Rotate Y to control the bulb glow. That way I could control 3 things with the one curve. It actually works quite well.
Here are some shots that show the different levels of glow:


I think it works quite well. Although I do think I need more time to tweak the effects and I would like to try a flare effect, but the render times are already pretty substantial, but I guess that's just part of it.
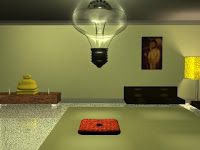
# posted by Andre : Sunday, October 28, 2007

![]()
Subscribe to Posts [Atom]